Try our cake pops recipe inspired by Starbucks’ very own Birthday Cake Pops! Aside from their famous Chocolate Frappuccino and Pumpkin Spice Latte drinks, popular American coffee shop Starbucks also offers baked goods. They have muffins, bread, croissants, donuts, and even cake pops!
Starbucks’ cake pops are actually a menu favorite! Many love the orange fox and pink and blue-haired unicorn cake pop. But in this recipe, we’ll show you how to make Starbucks’ Birthday Cake Pops!
This iconic, pink dessert is easy to make and is perfect for your kids’ birthday party celebrations. You don’t have to be a baking wizard to make these delicious and fun cake pop sticks for any celebration!
What Are Cake Pops?
Cake pops are cakes that are shaped like lollipop candies, made complete with the stick and their sweet, scrumptious taste. Cake pops usually come in basic dessert flavors like chocolate, vanilla, strawberry, red velvet, lemon, and more. But the Starbucks Birthday Cake Pops come in classic vanilla flavors.
Like Dalgona Coffee and Cloud Bread, the recipe for cake pops were first introduced through the internet. It’s not like traditional, family recipes that were passed down from generation to generation!
Many say that this delectable treat was first invented by an amateur baker slash blogger. In fact, many people say it was specifically created on the 1st of February in 2008, making this day the National Cake Pop Day.
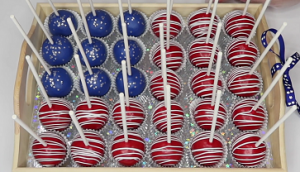
Ever since then, all kinds of foodies, bakers, and food establishments have tried their hand at making these sweet treats. They have become a classic party treat and a signature fixture at birthday celebrations.
How To Make Cake Pops
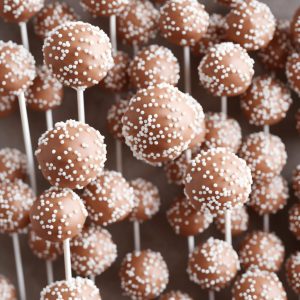
Cake pop recipes are easy! To form its iconic candy-like shape, the cake ingredient is crushed into crumbs and shaped into small balls. Then, it’s mixed with icing or frosting, and sometimes even chocolate. Lastly, it’s coated in more icing, and then attached with lollipop sticks!
We have a couple of tips for you when making cake pops. First, try not to use too much frosting. The cake base itself is already moist, so you just need to use a small amount of frosting. In shaping them, it’s handy to use a mini ice cream scoop when making balls out of the cake and frosting batter because it makes your cake pops come out equally proportioned. Lastly, it’s best to use a tall and narrow cup for our dip so that when you dip the balls into the coating, they’ll be totally submerged and come out completely covered.
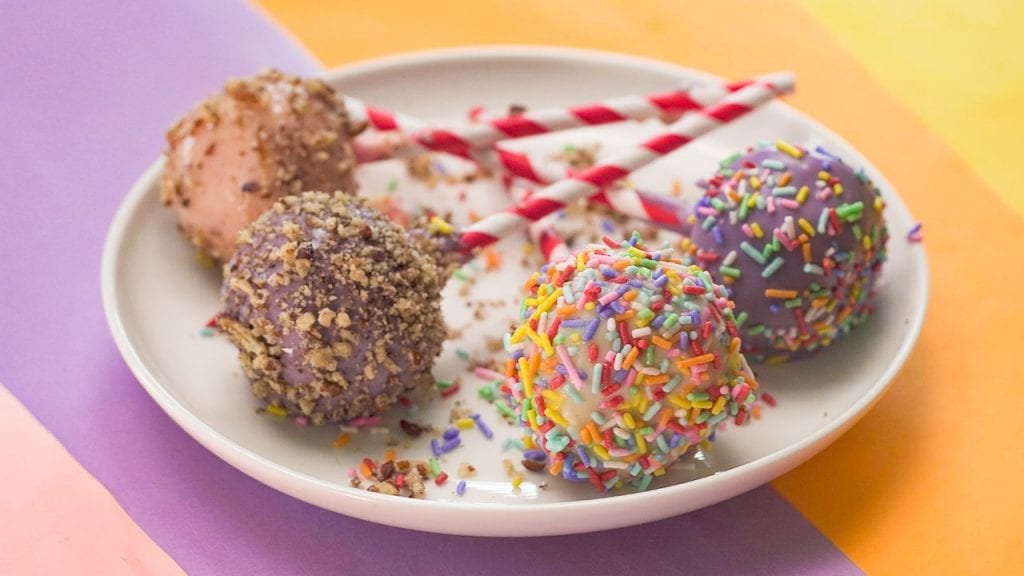
While this recipe uses chocolate icing, you can also opt for candy melts to make the coating for your cake pops. You can even go crazy on cake pops coatings and decorations! Sprinkle it with crushed chocolate chip cookies, graham crackers, Oreos, or even coconut and chopped nuts in addition to this recipe’s use of sprinkles.
Starbucks Birthday Cake Pops
In this easy cake pops recipe, we’ll show you how to recreate a favorite Starbucks cake— the Starbucks’ Birthday Cake Pops! These vanilla-flavored balls of delight are coated with pink, chocolatey frosting and dotted with cute, white sprinkles. They’re the perfect treat for kids’ birthday parties, with its chewy goodness and adorable appearance. They’re also the best birthday treats to make for home parties because of how easy they are to prepare. Any motivated parent can learn how to make cake balls or cake pops in one sitting.
And even better, in this copycat recipe, we’ll also show you how to make cake pops without mold. This neat trick won’t take too much effort. However, do keep in mind that you’ll be using your hands when shaping the cake crumbs into balls. If you want to keep things tidy, you can use plastic gloves while handling the food!
This copycat cake pop recipe of ours is also a fun way to bond with your kids. When preparing for the party, you can ask them to help you make these delicious treats since they’re so easy to do. Not only do they have something to boast about when their friends finally come around. Your child will also have a treasured memory to cherish forever of bonding with the family. After all, what’s better than making your very own cake (pops), right?
How To Make Copycat Starbucks Birthday Cake Pops
Taste chewy vanilla goodness on your kids’ special day with our copycat Starbucks Birthday Cake Pops Recipe! This homemade birthday treat is perfect for kiddies’ parties and celebrations.
Ingredients
For Cake Pops:
- 1 cup butter
- 1½ cups granulated sugar
- 1 tbsp vanilla
- 4 eggs
- 2½ cups cake flour, and a little extra for dusting
- ½ cup whole wheat flour
- 1 tbsp baking powder
- ½ tbsp salt
- 1¼ cup whole milk
For Vanilla Buttercream Frosting:
- ½ cup unsalted butter, softened
- ½ cup whole milk
- 1 tbsp vanilla
- 3¾ cups powdered sugar
For Chocolate Icing:
- 2 cups white or dark chocolate chips, semisweet
- 2 tbsp butter
For Serving:
- candy sprinkles
Instructions
Cake Pops:
- Preheat the oven to 350 degrees F.
- Grease and flour a 9 by 13-inch baking, then set aside.
- Sift together the cup cake flour, whole wheat flour, baking powder, and salt. Set aside.
- Cream together butter and sugar until pale and evenly incorporated. You can also use an electric mixer for this.
- Then, add the vanilla, milk, and eggs. Continue creaming.
- Fold the sifted dry ingredients into the wet ingredients in batches. Mix well after addition.
- Pour the batter into the greased cake pan.
- Bake for about 30 to 35 minutes, until a cake tester comes out clean. Set aside and let cool.
Vanilla Buttercream Frosting:
- Cream butter and powdered sugar until pale and evenly incorporated.
- Add milk and vanilla. Continue creaming. Then, set aside.
- Use a food processor to process the cooled cake until it turns into coarse crumbs.
- In a large bowl, gradually mix the cake crumbs with 1 cup of frosting at a time, until the crumbs are moist enough to remain in rolled balls. You can test this by squeezing the mixture together with your hand.
- Set aside any excess frosting.
- Make 2 tablespoon-sized balls out of the cake and set on a cookie sheet lined with parchment paper
- Freeze the cake balls for 10 minutes.
Chocolate Icing:
- Melt the butter and chocolate together for 2 minutes using a microwave. Stir the mixture at 20 second intervals.
- Remove the frozen cake from the freezer and attach with lollipop sticks.
- Dip the cake pops into your desired icing and cover with your choice of sprinkles.
- Serve and enjoy!
Nutrition
- Sugar: 39g
- :
- Calcium: 107mg
- Calories: 408kcal
- Carbohydrates: 54g
- Cholesterol: 41mg
- Fat: 19g
- Fiber: 1g
- Iron: 1mg
- Potassium: 158mg
- Protein: 5g
- Saturated Fat: 10g
- Sodium: 347mg
- Vitamin A: 587IU
- Vitamin C: 1mg
Was this page helpful?
Commonly Asked Questions
How to make cake pops with cake mix?
If ever you’re in a hurry, you can always swap out the cake pops ingredients with a simple cake mix. Just follow the cake mix’ instructions and bake yourself a base cake. Once done, you can make your vanilla buttercream frosting based on the recipe instructions and continue from there.
How far in advance can you make cake pops?
You can make the undipped cake balls 2 days to 6 weeks in advance. Then, you can just proceed to making your chocolate icing based on the recipe instructions on the day of serving. You can store the undipped cake balls in the refrigerator for a week, or in the freezer for up to 6 weeks. When you finally wish to use the cake balls, make sure to let it thaw overnight before dipping them in frosting.
How long do cake pops last?
Cake pops can last for 1 to 2 days at room temperature, while those stored in the fridge will be good for 5 to 7 more days. Storing the finished cake balls in the freezer can extend its lifespan to 2 to 3 months at best.
How to store cake pops?
In storing cake pops, it’s important to keep their frosting from dripping off or cracking. You can simply place cake pops in an airtight container if you want to store them in room temperature or the fridge. However, do remember to keep them away from direct sunlight or heat to prevent its coating from melting. They can last longer than 1 or 2 days when stored in the fridge. Refrigerate them by placing them in an airtight container lined with paper towels in one single layer. You can also place them in a freezer bag you plan on storing them in the freezer. However, we discourage freezing cake pops because even though it makes them last longer, it actually makes the coating more susceptible to cracking.
Conclusion
You’ll make any birthday party celebration truly amazing, fun, and memorable with our Copycat Starbucks Birthday Cake Pops Recipe! These scrumptious treats are sweet and chewy, making them the best dessert for your kid’s special day.Have your own special recipe to share? Submit Your Recipe Today!
Related Recipes